How to Customise an Existing Template's Colours, Fonts, and Layout
You've downloaded a template - or perhaps inherited one from a previous employee - and it's almost perfect. The structure works, the layout makes sense, but the colours scream 2015 corporate blue when your brand is all about modern teal and charcoal. The fonts? Let's not even go there.
If this sounds familiar, you're not alone. Most businesses find themselves in this exact position, staring at a perfectly functional template that just doesn't quite fit. The good news is that customising an existing template doesn't require a design degree or hours of frustration. With the right approach, you can transform any Microsoft Office template into something that actually represents your brand.
This guide will walk you through the practical steps of customising colours, fonts, and layouts in your PowerPoint, Word, and Excel templates. Whether you're working with professional Microsoft Office templates or generic downloads, these techniques will help you make them truly yours.
Why Bother Customising Templates at All?
Your templates are more than just convenient starting points, they're silent ambassadors for your brand. Every proposal, presentation, and report that leaves your organisation carries your visual identity.
Generic templates with default colours and standard fonts don't just look boring, they undermine your professional credibility. When you invest time in customising templates properly, you're creating tools that save time while maintaining brand consistency across your entire team.
The alternative is watching your colleagues manually format documents repeatedly, creating inconsistent outputs that make your organisation look disjointed. Not ideal.
Understanding How Templates Actually Work
Most people treat templates like regular documents with fancy formatting. This leads to frustration and templates that break the moment someone tries to use them properly.
Templates in Microsoft Office work on a hierarchical system. In PowerPoint, this is the Slide Master. In Word, it's Styles. In Excel, it's Theme Colours and Cell Styles. Understanding this hierarchy is the secret to customisation that sticks.
When you change colours or fonts at the master level, those changes cascade down through every element of your template. Change a colour in the theme, and suddenly every chart, shape, and text box updates automatically. This is how professional Microsoft template customisation works - systematically, not cosmetically.
Customising Colours: Beyond Find and Replace
The rookie mistake is changing colours one element at a time. Click a shape, change its fill, move to the next shape. This approach is tedious and fragile. The moment someone adds a new element, they're stuck guessing which shade of blue to use.
Professional PowerPoint templates for business use "Theme Colors" - a palette that defines your entire presentation's colour scheme. Access this in PowerPoint through Design > Variants > Colors > Customize Colors. You'll see options for Text/Background colours, Accent colours, and Hyperlinks.
Your first four Accent colours will drive most of your visual elements. Charts, SmartArt, shapes - they all pull from this palette. Choose these carefully based on your brand guidelines, not on what looks pretty in isolation.
For Word documents, the same theme colour system applies. Navigate to Design > Colors to access your palette. The difference is that Word templates typically use fewer accent colours and rely more heavily on Text/Background combinations. A professional document template design usually sticks to 2-3 brand colours plus neutrals.
Excel template colour customisation follows identical principles, but with one big difference - conditional formatting and chart colours need manual attention. Even after setting your theme colours, check that your chart templates and data visualisation tools are pulling from the right palette.
Big tip: always test your colours in different lighting conditions and on different screens. That vibrant teal that looks perfect on your monitor might turn muddy on a projector. Corporate branding PowerPoint templates need to work in boardrooms, not just on your laptop.
Getting Your Fonts Right
Font customisation separates amateur templates from professional ones. Most downloaded templates come with font choices that were trendy in 2012 or defaulted to Calibri because that's what Microsoft includes.
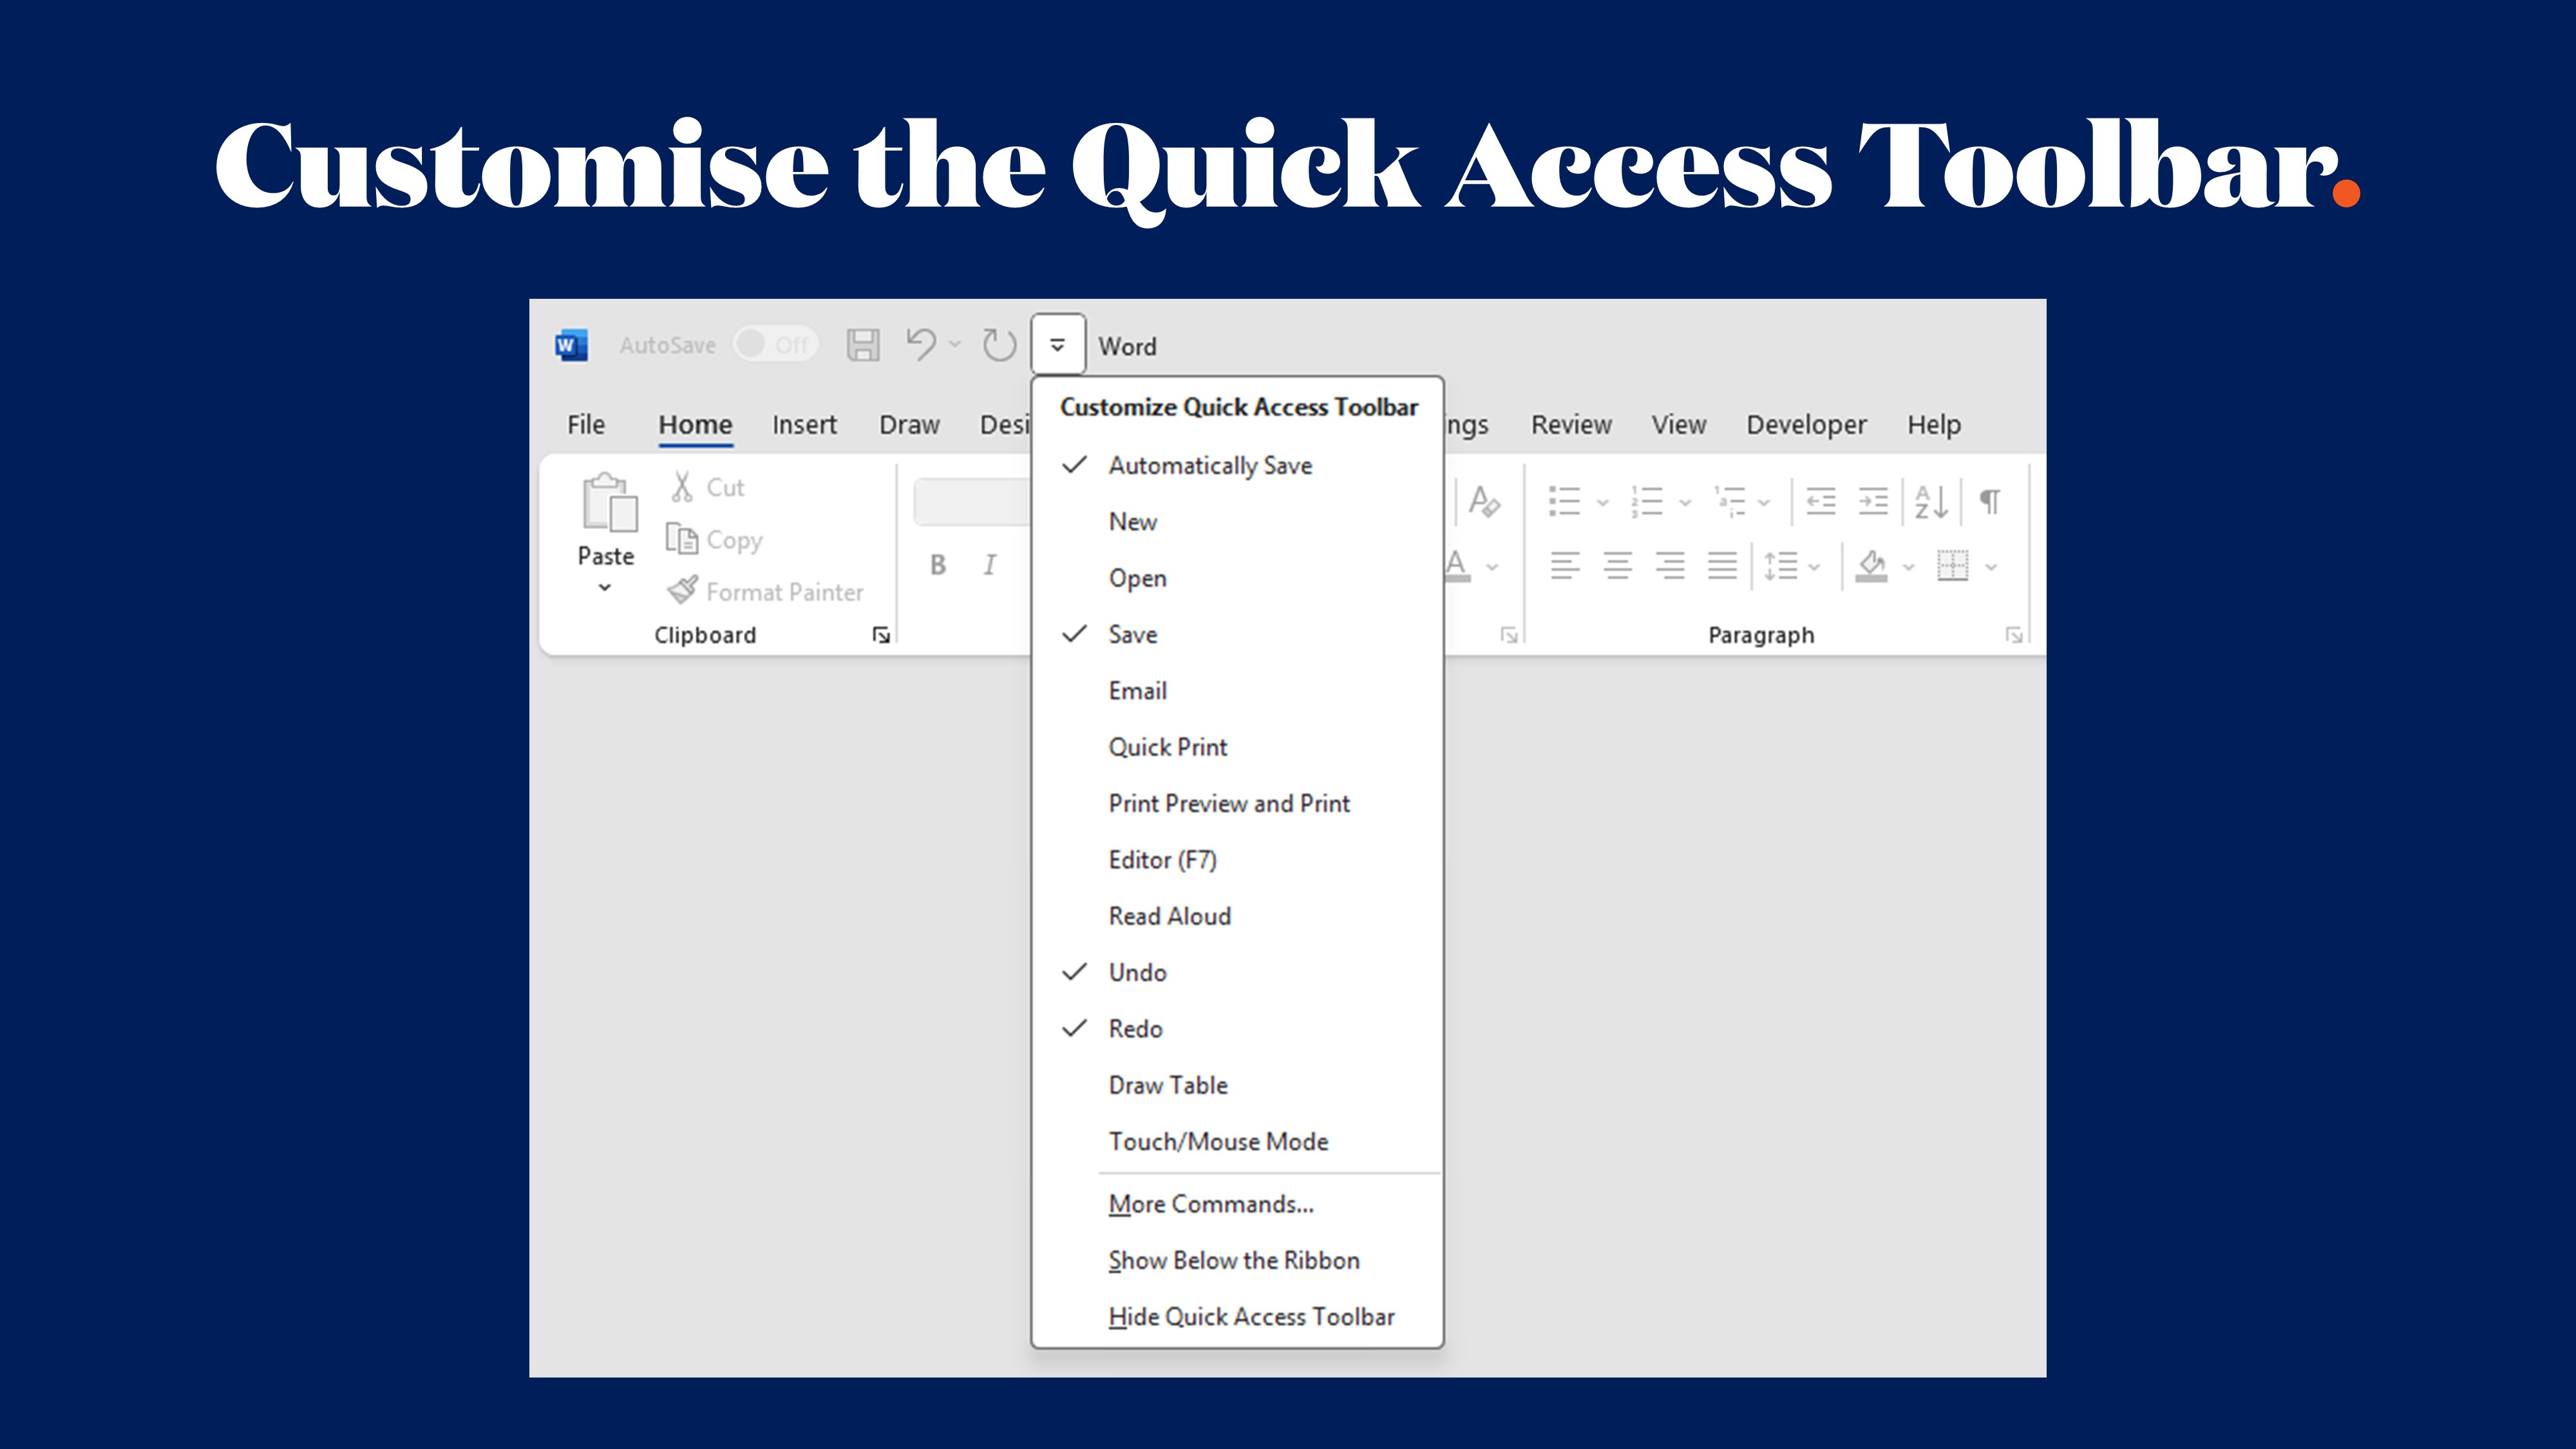
Your corporate Microsoft template packages should use fonts that align with your brand guidelines. Access font customisation through Design > Variants > Fonts > Customize Fonts in PowerPoint. You'll set a Heading font and a Body font - these two choices will control your entire template.
The Heading font appears in titles, slide headers, and any text formatted as a heading style. This is where you can be slightly bolder - a sans-serif font with personality that captures your brand character. The Body font handles all your paragraph text and needs to prioritise readability over style.
For Word templates, the process is similar but the stakes are higher. People will actually read paragraphs in Word documents, unlike PowerPoint where text is typically minimal. Your body font needs to be comfortable to read for extended periods. Avoid anything too condensed, too light, or too decorative.
Font size matters more than most people realise. A professional document template design typically uses 11-12pt for body text in Word, and 18pt minimum for body text in PowerPoint. Any smaller and you're creating templates that strain eyes and reduce comprehension.
Word of warning: font licensing. That gorgeous custom font from your brand guidelines might not be licensed for embedding in templates that you share externally. Check licensing restrictions before committing to font choices that could create legal headaches later.
Mastering Layout Customisation
This is where most template customisation attempts fall apart. People open the Slide Master or modify a Word style, make changes, and then wonder why nothing updates correctly. Layout customisation requires understanding the relationship between masters and content.
In PowerPoint, every slide layout you use - Title Slide, Content Slide, Comparison - lives in the Slide Master view. Access this through View > Slide Master. You'll see a hierarchy with the master slide at the top and individual layouts below it. Changes to the master affect everything below it. Changes to individual layouts affect only that specific layout.
Here's how to approach layout customisation systematically: Start with the master slide. Set your background, define your safe zones, place any elements that should appear on every slide (page numbers, logos, footers). Then work through each layout individually, adjusting placeholder positions and sizes to match your content needs.
Microsoft 365 template solutions offer smart guides and alignment tools that make layout adjustments precise. Use them. Eyeballing alignment leads to layouts that look "off" in ways people can't quite articulate but definitely notice.
Word layout customisation centres on modifying styles rather than repositioning placeholders. Access styles through Home > Styles, then right-click any style to modify it. Your heading styles control the entire document hierarchy - Heading 1 for main sections, Heading 2 for subsections, and so forth.
The key is consistency across your company-wide Microsoft Office template systems. If your PowerPoint templates use 2cm margins, your Word templates should match. When someone moves from preparing a presentation to writing a supporting document, the visual language should feel cohesive.
Excel layout customisation is less about masters and more about defining cell styles, table formats, and chart templates. Create reusable formats through Home > Cell Styles > New Cell Style. Name them clearly (Header Row, Data Input, Calculated Result) so team members know which style to apply when.
Common Pitfalls and How to Avoid Them
Even experienced users make predictable mistakes when customising templates. The most common is making changes in Normal view instead of the master or style level. These changes won't persist when someone creates a new slide or applies a style.
Forgetting to lock elements is a recipe for chaos. In PowerPoint, you can't truly "lock" objects, but you can remove them from layouts and add them to the master instead. In Word, use document protection to prevent users from modifying specific sections. In Excel, protect worksheets to lock formatting while allowing data entry.
One subtle but significant mistake is neglecting to test templates with real content. Your layout might look perfect with lorem ipsum text and placeholder images, but falls apart when someone pastes their actual quarterly results. Always test templates with realistic content before rolling them out.
When to Call in the Experts
There's a point where DIY template customisation stops being efficient. If you're spending days trying to get your headers to behave, or your style inheritance isn't working as expected, you've passed that point.
Microsoft template customisation service providers understand the technical quirks that trip up casual users. We know how to make styles inherit correctly, how to structure templates so they remain stable even when users try creative workarounds, and how to build in just enough flexibility without allowing chaos.
Converting existing documents to templates is particularly tricky. Those 47 slightly different letterhead versions scattered across your network need to be consolidated into one properly structured template. This requires analysing what's common across all versions, identifying the variations that matter, and building a system that accommodates legitimate differences while eliminating inconsistency.
Professional template designers also consider use cases you might not anticipate. We think about the colleague who always copies content from PDFs (and breaks all the formatting), the executive who insists on using red text for urgency, and the remote employee working on a Mac who needs templates that work cross-platform.
Transform Your Word Templates with Expert Help
Customising Word templates properly takes time, technical knowledge, and design sensibility. When your templates represent your organisation's brand and professionalism, getting them right matters.
At Ideaseed, we specialise in creating custom Microsoft Word templates that not only look professional but actually function the way your team needs them to. We understand the technical foundations that make templates stable, the design principles that make them attractive, and the practical considerations that make them genuinely useful.
Our Microsoft template design services go beyond just making things look pretty. We build time-saving Microsoft template systems that include your brand colours, fonts, and layouts while incorporating the automation features and structural elements that help your team work more efficiently.
We've helped businesses transform their document workflows through professionally designed Word templates. From simple letterheads to complex report templates with automated sections and built-in compliance features, we create solutions that save time and eliminate brand inconsistency.
Ready to stop wrestling with Word templates and start using tools that actually work for your team? Take our free template audit questionnaire to discover where your current templates might be falling short and how we can help improve them.
Whether you need a complete template system overhaul or just want to refine a few key documents, our team of Microsoft Office experts can help you create branded, functional, easy-to-use templates that make your organisation look as professional as it actually is. Get in touch to find out how we can save you time, reduce frustration, and ensure every piece of collateral that leaves your organisation reinforces your brand perfectly.

RAVE REVIEWS
who we work with


.svg)
.svg)
.svg)
.svg)


%20(2).avif)


.svg)